
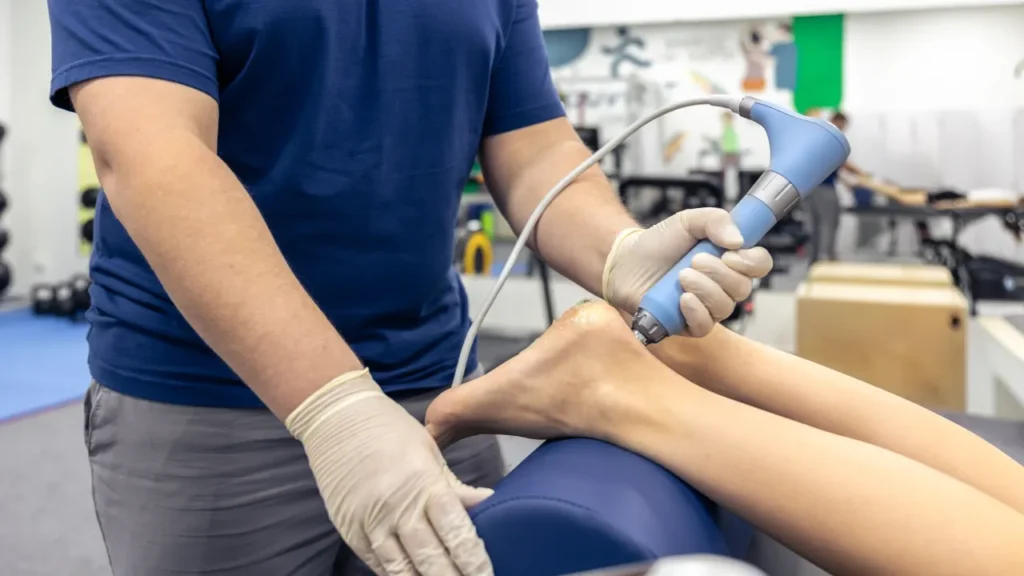
Explore 7 key facts about Shockwave therapy, its potential uses, soft tissue recovery, and whether it may suit certain injuries in Beaumont.
Explore 7 key facts about Shockwave therapy, its potential uses, soft tissue recovery, and whether it may suit certain injuries in Beaumont.

Learn smart ways to manage Musculoskeletal Injuries, stay active, build strength, and return to daily activities with practical movement tips and physiotherapy.
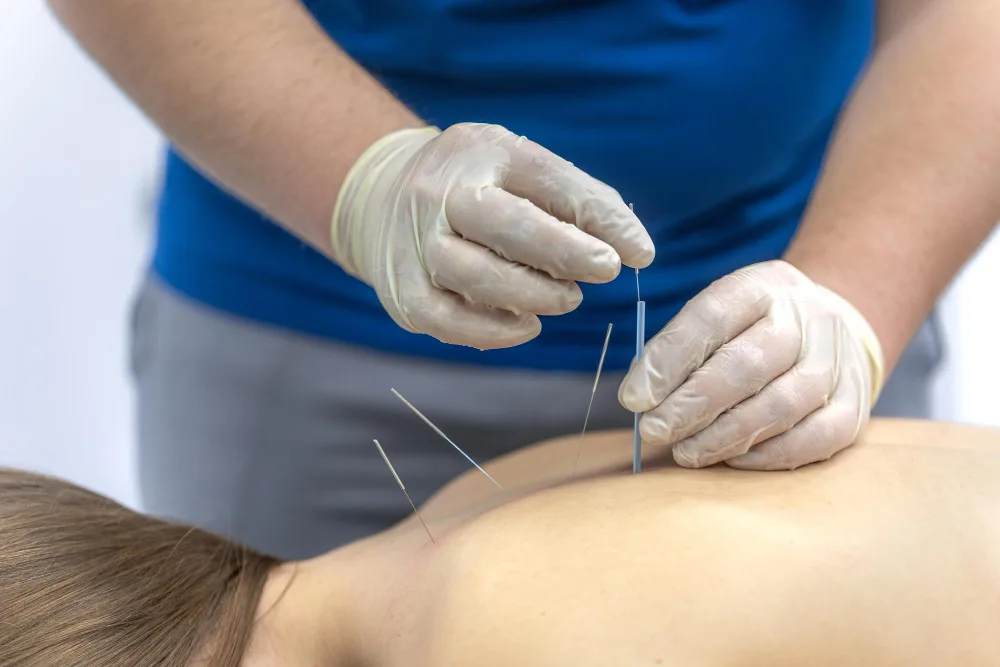
Muscle pain can make even simple daily tasks feel challenging. Whether it develops from sports, long hours at a desk, repetitive movements, or physical strain, ongoing muscle tightness can affect mobility, posture, and overall comfort. Dry needling physiotherapy is a treatment that targets tight muscles and trigger points to encourage improved movement and reduce muscle tension.
At The Bright Physio & Mindfulness Massage in Beaumont, dry needling physiotherapy is used alongside physiotherapy techniques to support muscle recovery, improve flexibility, and help clients return to their normal activities. This article explains how the treatment works, its potential benefits, and who may benefit from it.
Dry needling physiotherapy is a technique that uses fine, sterile needles to target myofascial trigger points, commonly known as muscle knots. These tight bands of muscle can develop because of overuse, poor posture, injury, repetitive movement, or physical stress.
Unlike injections, the needles do not contain any substance. Instead, they stimulate specific muscle areas to encourage relaxation, improve circulation, and support normal muscle function.
The treatment is performed by a qualified physiotherapist who understands muscle anatomy and movement patterns.
When the needle reaches a trigger point, the muscle may briefly contract before relaxing. This response helps release tension and improve muscle function.
The treatment may support:
Because every person has different needs, treatment plans are based on individual assessments and physical findings.
Many people choose dry needling physiotherapy to manage muscle tightness associated with everyday activities or physical demands.
It may be considered for:
Your physiotherapist will determine whether this technique is suitable after a thorough assessment.
Many clients notice improved comfort and movement after treatment, particularly when it forms part of a broader physiotherapy plan.
Potential benefits include the following:
Combining treatment with stretching and strengthening exercises often helps maintain long-term muscle health.
Your first appointment begins with a discussion about your symptoms, activity level, medical history, and treatment goals.
During the session, your physiotherapist may:
Most appointments are relatively short, and many people return to normal daily activities soon afterward.
Most people describe the sensation as mild and brief. You may feel:
These responses are common and often settle within a day or two.
Your physiotherapist will explain what to expect before treatment begins.
Simple habits can support muscle recovery after treatment.
You can:
Combining these habits with dry needling physiotherapy may help improve muscle function over time.
At The Bright Physio & Mindfulness Massage in Beaumont, each client receives a thorough assessment before treatment begins. The clinic focuses on identifying the source of muscle tension rather than only addressing the symptoms.
Treatment may combine dry needling with manual therapy, mobility exercises, stretching, and physiotherapy techniques to support improved movement and muscle function.
Whether your discomfort comes from work, sport, or everyday activities, the team aims to help you move with greater comfort and confidence.
The number of appointments depends on your condition, activity level, and treatment goals. Your physiotherapist will recommend an appropriate plan after your assessment.
Although both treatments use fine needles, they are based on different clinical principles. Dry needling physiotherapy focuses on treating muscle trigger points and movement-related conditions.
Light movement is often encouraged. Your physiotherapist will advise when you can safely return to more demanding activities.
Some medical conditions or circumstances may require alternative treatment options. Your physiotherapist will discuss your medical history before beginning treatment.
Muscle tightness can affect how you move, work, exercise, and enjoy everyday life. Dry needling physiotherapy provides a targeted approach to releasing trigger points, improving muscle function, and supporting recovery when combined with physiotherapy and movement-based care. If you are looking for professional physiotherapy services in Beaumont, The Bright Physio & Mindfulness Massage can help you explore whether dry needling physiotherapy is the right option for your needs.
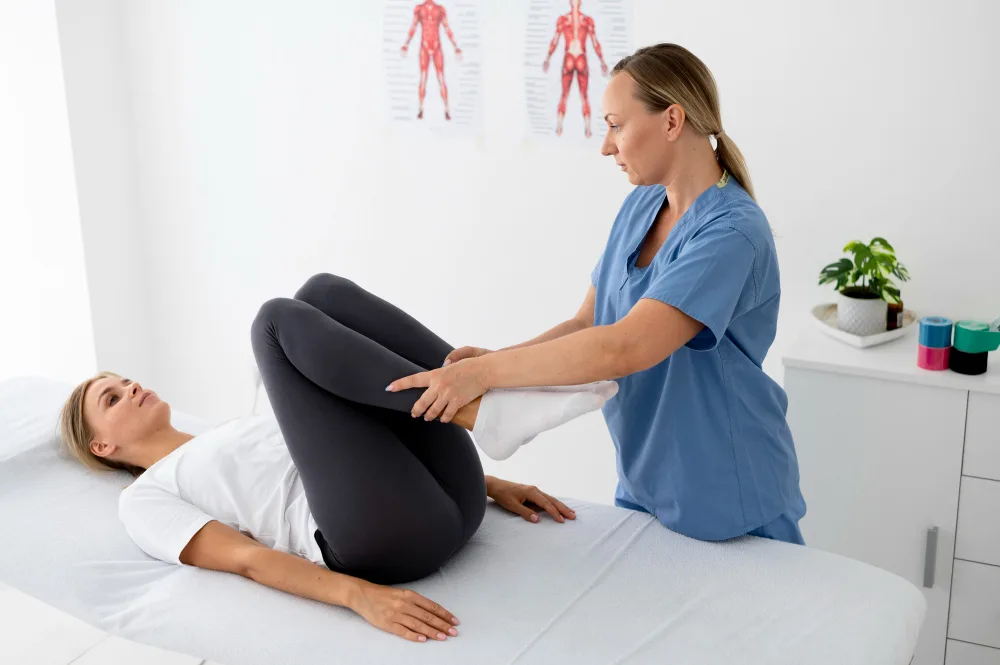
Pregnancy and childbirth bring many changes to the body. As the baby grows, extra pressure is placed on the muscles, joints, and connective tissues, especially the pelvic floor. After delivery, these muscles may need time and support to recover, whether the birth was vaginal or by caesarean section.
Pelvic floor physiotherapy helps many women prepare for childbirth, manage physical changes during pregnancy, and regain strength after delivery. At The Bright Physio & Mindfulness Massage in Beaumont, this approach focuses on improving pelvic health, restoring muscle function, and supporting confidence during daily activities.
This guide explains how pelvic floor physiotherapy works, its benefits during pregnancy and postpartum recovery, and why many women include it in their maternity care journey.
Pelvic Floor Physiotherapy focuses on assessing and improving the function of the pelvic floor muscles. These muscles form a supportive layer at the base of the pelvis and play an important role in bladder control, bowel function, core stability, and support for the pelvic organs.
During pregnancy and after childbirth, these muscles experience increased strain. A physiotherapist evaluates muscle strength, coordination, and flexibility before creating a suitable treatment plan that matches your stage of recovery.
As pregnancy progresses, the pelvic floor supports the growing weight of the baby, uterus, and surrounding tissues. Hormonal changes also affect muscle and ligament flexibility, making proper muscle function even more important.
Healthy pelvic floor muscles help:
Maintaining pelvic floor function may also make everyday activities more comfortable as pregnancy advances.
Many women begin pelvic floor physiotherapy during pregnancy to improve muscle awareness and prepare their bodies for labor.
Treatment may include:
These sessions aim to improve muscle coordination rather than simply strengthening the pelvic floor.
Following childbirth, the pelvic floor may feel weaker due to stretching or muscle strain. Recovery varies from person to person, making professional assessment valuable.
Pelvic Floor Physiotherapy may support postpartum recovery by helping women
Recovery plans are adjusted according to each person’s birth experience, symptoms, and recovery goals.
Many women seek pelvic floor physiotherapy for concerns that develop during pregnancy or after childbirth.
These may include:
Early assessment allows many women to understand what their bodies need during recovery.
Your first visit begins with a detailed discussion about your pregnancy, birth history, current symptoms, and personal goals.
Your physiotherapist may:
Every step of the assessment is discussed beforehand, and your comfort remains a priority throughout the appointment.
Exercise plans vary depending on pregnancy stage or postpartum recovery.
Common exercises may include:
Consistency often produces the most noticeable improvements over time.
Many women benefit from an assessment even if they are not currently experiencing symptoms.
You may wish to consider pelvic floor physiotherapy if you:
Early care can help identify muscle changes before they become more noticeable.
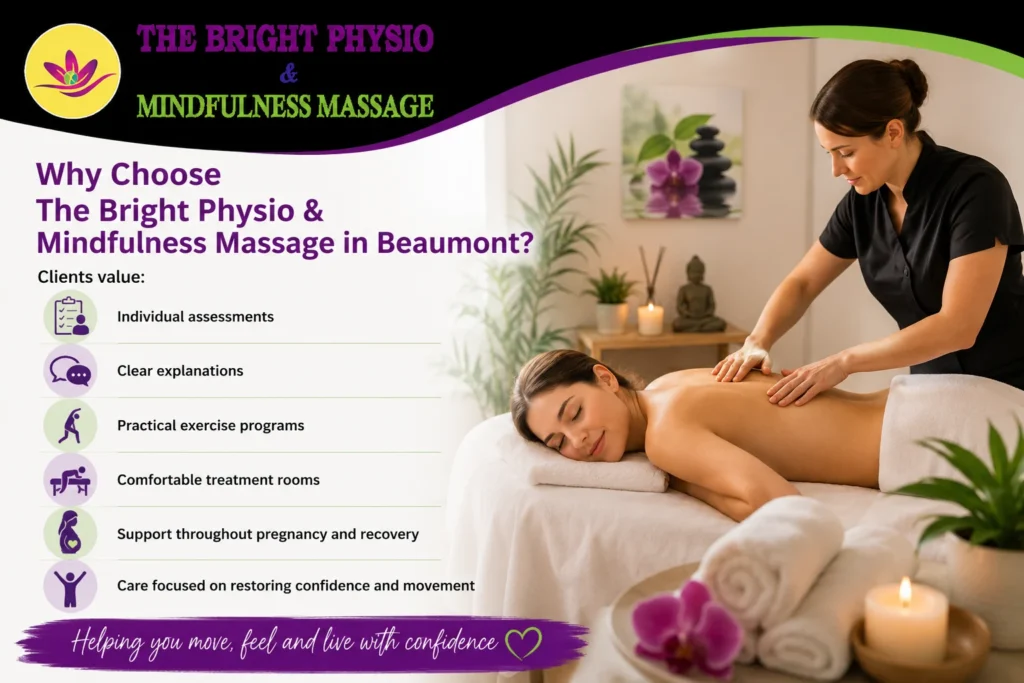
At The Bright Physio & Mindfulness Massage in Beaumont, women receive compassionate care in a calm and welcoming environment.
Clients value:
Whether you are preparing for your baby’s arrival or recovering after childbirth, the clinic provides professional support throughout every stage.
Simple daily habits can support your progress between appointments.
These habits complement the work completed during pelvic floor physiotherapy sessions.
Yes. A qualified physiotherapist adjusts every assessment and exercise program according to your stage of pregnancy and your individual needs.
Many women attend an assessment several weeks after delivery, although the ideal timing depends on individual recovery and advice from their healthcare provider.
Yes. Although the pelvic floor experiences different stresses during a caesarean birth, many women still benefit from assessment and rehabilitation.
Yes. Home exercises often form an important part of recovery and help improve strength and coordination between appointments.
Pregnancy and childbirth place unique demands on the body, but recovery does not have to be faced alone. Pelvic floor physiotherapy supports pelvic muscle function, core stability, bladder control, and confidence during everyday activities. Whether you are preparing for birth or recovering afterward, The Bright Physio & Mindfulness Massage in Beaumont provides professional care to help you move comfortably and confidently through every stage of motherhood.
If you are ready to support your recovery, pelvic floor physiotherapy can play an important role in your journey toward stronger pelvic health.
Contact The Bright Physio & Mindfulness Massage today to book your appointment and learn how pelvic floor physiotherapy can support your wellness goals. Our clinic is conveniently located at 4904 30 Ave, Beaumont, Alberta, making it easier for mothers and families in Beaumont and surrounding areas to access personalized physiotherapy care.
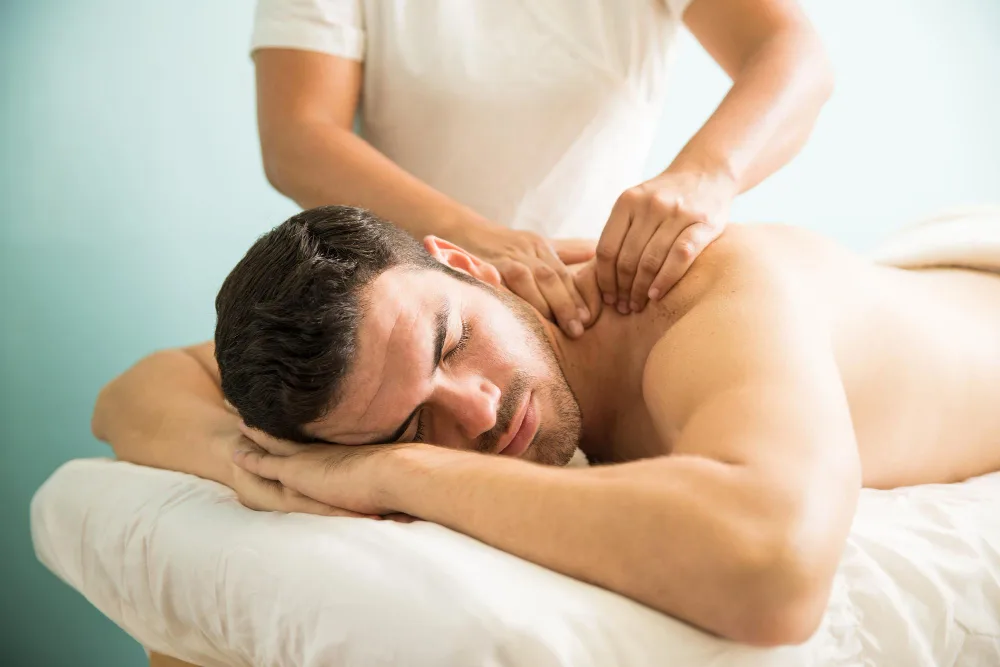
Daily routines, work demands, sports, and stress can place constant pressure on the body. Many people look for natural ways to ease muscle tightness, improve movement, and feel more comfortable during everyday activities. Massage therapy is one approach that focuses on soft tissues to encourage relaxation, support circulation, and reduce physical tension.
At The Bright Physio & Mindfulness Massage in Beaumont, clients receive care that matches their goals, whether they want support after physical activity, relief from desk-related stiffness, or a quiet moment to unwind. This article explains how massage therapy works, who may benefit from it, and why it remains a popular part of many wellness routines.
Massage therapy is a hands-on practice that involves applying pressure, movement, and various manual techniques to muscles, tendons, ligaments, and other soft tissues. The aim is to ease muscle tension, encourage blood flow, support joint mobility, and create a sense of physical ease.
Sessions may vary depending on a person’s needs. Some focus on relaxation, while others address muscle tightness caused by work, sports, or repetitive movement. A trained practitioner selects techniques that match the condition of the muscles and the desired outcome.
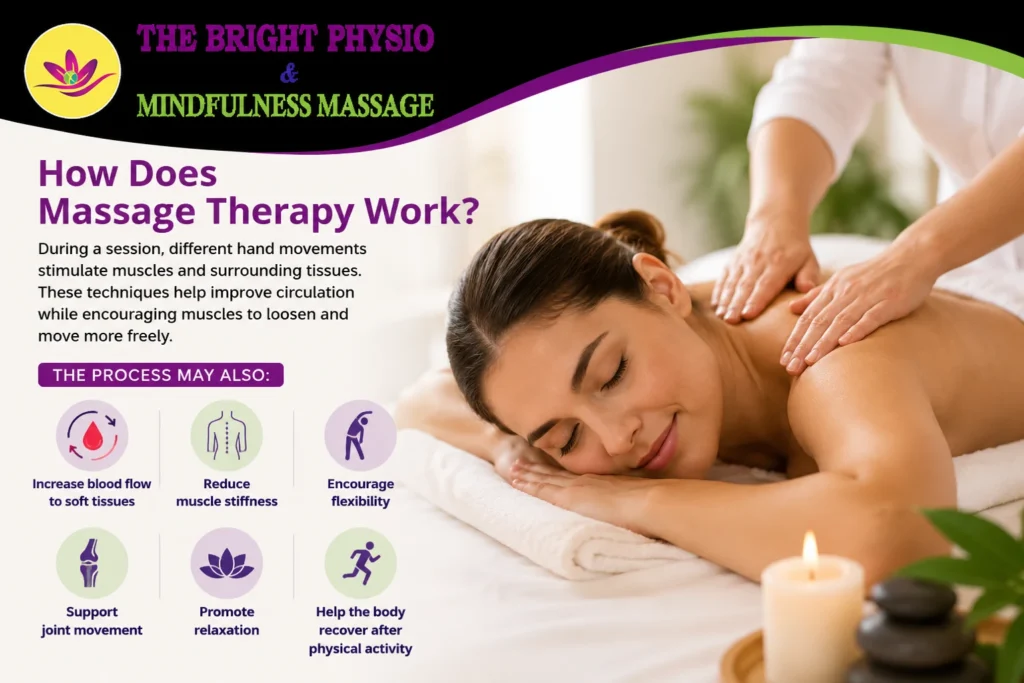
During a session, different hand movements stimulate muscles and surrounding tissues. These techniques help improve circulation while encouraging muscles to loosen and move more freely.
The process may also:
Because every person has different physical demands, each session may focus on different muscle groups or movement patterns.
Several approaches are available depending on individual goals.
This gentle style uses long strokes and light kneading techniques. It suits people who want relaxation and reduced muscle tension.
This approach targets deeper muscle layers and connective tissue. It is often chosen for ongoing muscle tightness or areas affected by repetitive movement.
Athletes and active individuals often choose this method before or after training. It supports muscle recovery and prepares the body for physical activity.
This technique focuses on small areas of muscle tightness that may contribute to discomfort in nearby regions.
At The Bright Physio & Mindfulness Massage, mindfulness elements may be included to encourage calm breathing and greater body awareness throughout the session.
Many people include massage therapy in their wellness routine because it supports both physical comfort and emotional calm.
Some commonly reported benefits include:
These outcomes often become more noticeable when sessions are combined with stretching, regular movement, and healthy daily habits.
Many people from different age groups and lifestyles may find value in massage therapy.
It may suit:
Before beginning any new wellness service, it is always wise to discuss your health history with your practitioner.
A typical appointment begins with a conversation about your goals, daily activities, and any areas requiring attention.
During the session, your practitioner may:
Afterward, many people feel relaxed while noticing increased ease of movement. Drinking water and remaining gently active can support the body’s natural recovery process following massage therapy.
Choosing a trusted clinic makes a difference in your overall experience.
At The Bright Physio & Mindfulness Massage in Beaumont, clients appreciate the following:
Whether you spend long hours at a desk, enjoy regular exercise, or simply want to reduce muscle tension, the clinic provides a comfortable setting where your needs remain the priority.
Simple habits can help you enjoy the full value of each visit.
These small actions can support healthy muscles and encourage consistent progress.
The ideal schedule depends on your lifestyle, activity level, and personal goals. Some people visit monthly, while others attend more frequently during physically demanding periods.
Many active people choose massage therapy after training because it supports muscle recovery and encourages flexibility.
No. Many people also book sessions simply to relax, reduce stress, and maintain healthy muscle function.
Yes. Always let your practitioner know if you would like more or less pressure or if any technique feels uncomfortable.
Adding massage therapy to your wellness routine can support muscle comfort, mobility, relaxation, and everyday function. Whether your goal is easing physical tension, supporting recovery after activity, or taking time to unwind, regular sessions may help you maintain an active and balanced lifestyle.
If you are looking for caring, professional massage therapy in Beaumont, Alberta, The Bright Physio & Mindfulness Massage provides a welcoming environment where your health and well-being come first.
Ready to book your appointment? Contact The Bright Physio & Mindfulness Massage today to schedule a session with a registered massage therapist in Beaumont. Our clinic is conveniently located at 4904 30 Ave, Beaumont, Alberta, making it easy for residents of Beaumont and nearby communities to access quality massage therapy services. We look forward to helping you feel your best.

Explore 7 ways Manual therapy may support muscle flexibility, easier movement, and mobility with care from The Bright Physio & Mindfulness Massage in Beaumont.

Giving birth is a monumental physical feat. Whether you delivered vaginally or via cesarean section, your pelvic floor muscles, the hammock of muscles supporting your bladder, uterus, and bowels, have undergone immense stretching and strain. Restoring this critical foundation is essential for long-term health, physical stability, and comfort.
This complete guide delivers a clinically backed, realistic roadmap to safely rehabilitating your pelvic floor, stopping leaks, and reclaiming your core strength.
You can safely begin gentle, sub-maximal pelvic floor activations within 24 to 48 hours after an uncomplicated vaginal birth, provided you feel ready. If you experienced severe tearing or had a C-section, wait for explicit clearance from your healthcare provider, typically around your six-week postpartum checkup.
The old advice of waiting completely until six weeks postpartum often slows down the initial healing process. Early, gentle movement increases blood flow to the perineum, which actually speeds up tissue repair, helps reduce localized swelling, and initiates early nerve re-education. However, “early exercise” at this stage does not mean intense pushing or straining; it means quiet, intentional breathwork.
A correct postpartum Kegel requires an internal lift-and-squeeze motion coordinated with your breath, followed by a total, conscious relaxation of the muscles. Avoid squeezing your glutes, gripping your inner thighs, or holding your breath, as these common errors place counterproductive pressure on your healing pelvic floor.
Many individuals perform Kegels incorrectly by bearing down instead of lifting, which can worsen tissue laxity or pelvic organ prolapse. Think of the pelvic floor as an elevator. Your goal is to close the elevator doors and lift the carriage up to the first or second floor, hold it steady, and then let it descend completely back to the basement.
To truly isolate these deep muscles, find a comfortable, supported position, either lying on your side or sitting slightly forward on a firm chair.
True postpartum recovery requires integrating pelvic floor exercises with deep abdominal training, specifically targeting the transversus abdominis muscle. Isolating the pelvic floor is highly beneficial, but linking it directly to your global core system ensures your body can handle everyday functional loads, lifting, and exercise.
The pelvic floor does not function in a vacuum; it acts as the baseline foundation of your deep core canister. The top of this canister is your diaphragm, the front and sides are your transversus abdominis, the back consists of the multifidus muscles, and the bottom is the pelvic floor. When you inhale, the diaphragm and pelvic floor descend together. When you exhale, they lift together.
Once you can isolate your pelvic floor while resting, you must teach it to work in tandem with your moving body. Start with simple, low-impact movements on a mat:
If you struggle to feel these connections, experience lower back instability, or suspect you have diastasis recti (a wider-than-normal separation of the abdominal muscles), seeking specialized evaluation can make a massive difference. Partnering with a professional for targeted Pelvic floor physiotherapy provides you with a customized, safe protocol that bridges the gap between basic recovery and returning to high-impact fitness.
Common postpartum pelvic floor issues include urinary incontinence, bowel leaking, painful intercourse, and pelvic organ prolapse. While mild symptoms are incredibly common in the early weeks, experiencing persistent pain, severe internal pressure, or continuous leaking past your six-week mark warrants a comprehensive medical assessment.
Many women are told that leaking urine when sneezing or running is simply a normal consequence of motherhood. This is a myth. While it is common, it is a clear sign of underlying muscular dysfunction that can be corrected with targeted rehabilitation. Ignoring these early warning signs can lead to chronic structural issues years down the line.
If your symptoms do not steadily improve or if they begin to actively interfere with your daily life, reach out to specialized clinics, such as those offering Advanced Physiotherapy Beaumont, for an objective internal assessment. A physical therapist can measure your exact muscle strength, check for structural tissue damage, and ensure you are not accidentally making your symptoms worse by straining.
Protecting your pelvic floor daily involves practicing optimal bathroom posture, avoiding heavy lifting, managing chronic constipation, and using the “blow-as-you-go” breathing technique during exertion. These simple behavioral modifications prevent excessive intra-abdominal pressure from straining your fragile, healing tissues.
The physical exercises you perform for 10 minutes a day can easily be undone by poor mechanics during the other 23 hours. Your everyday movements determine how well your tissues heal. For example, straining on the toilet or aggressively muscling your way out of bed places immense pressure directly onto a vulnerable pelvic floor.
Traditional Sit-Up –> Crushes core, pushes pressure DOWN onto the pelvic floor. ❌
Log-Rolling Method –> Roll to side, use arms to push up. Protects tissues. ✓
Returning to high-impact fitness safely requires a gradual, systematic progression over several months, rather than jumping straight back into running or jumping at six weeks. Your body needs sufficient time to rebuild its baseline strength, structural tissue integrity, and impact tolerance before handling intense athletic loads.
Many postpartum individuals feel pressured to “bounce back” quickly into high-intensity interval training (HIIT), running, or heavy weightlifting as soon as they reach their six-week milestone. However, internal collagen and connective tissues can take anywhere from six months to a full year to regain their pre-pregnancy tensile strength. Rushing this timeline significantly increases your risk of developing a pelvic organ prolapse or long-term urinary incontinence.
Before you introduce any running, jumping, or heavy lifting into your fitness routine, ensure you can comfortably check off every single item on this functional checklist:
If you experience any leaking, pain, or internal pressure during these baseline tests, your body is telling you that its foundation needs more time and dedicated training. Scale back your intensity, focus on your core integration exercises, and give yourself the grace of a slow, sustainable, and truly healthy recovery.
Living with persistent dizziness, vertigo, or unsteadiness can make your world feel completely unpredictable. Simple tasks like getting out of bed, driving down the Highway 63 corridor, or checking the top shelves at a local Beaumont grocery store can become overwhelming hurdles. Many people suffering from these balance issues struggle through multiple diagnostic tests and prescription medications without finding real relief.
When structural medical imaging returns completely normal results, the underlying issue frequently stems from a functional mismatch within your inner ear balance mechanics. Vestibular rehabilitation therapy offers a highly precise, clinically proven physical pathway to reset these sensory networks and return stability to your daily life.
What is the primary cause of chronic dizziness and vertigo? Chronic dizziness is often caused by a sensory mismatch between your inner ear’s vestibular system, your eyes, and your body’s joint sensors. When illness, injury, or displaced micro-crystals disrupt these pathways, your brain receives conflicting spatial signals, creating a false sensation of spinning or motion.
To find a lasting solution, it helps to understand how your brain tracks movement. Your internal navigation system relies on two delicate structures located deep inside your temporal bone: the semicircular canals, which track rotation, and the otolith organs (the utricle and saccule), which track gravity and forward-backward motion.
These structures utilize fluid and microscopic hair cells to convert physical head movements into constant electrical updates for your central nervous system. When working correctly, these updates coordinate seamlessly with your eyes and leg joints to keep your vision steady and your body balanced.
When an inflammation, viral infection, or physical impact disrupts this delicate network, the signals from one side of your head no longer match the signals from the other. Your eyes may tell your brain that you are sitting perfectly still, but your inner ear insists you are spinning. This internal communication breakdown causes the disorienting sensations of vertigo, nausea, and lightheadedness.
If you are experiencing these spatial conflicts, seeking out a dedicated program for Dizziness treatment physiotherapy is an exceptionally reliable way to retrain your brain to handle this sensory data correctly.
Which specific balance disorders respond best to physical rehabilitation? Vestibular therapy effectively treats Benign Paroxysmal Positional Vertigo (BPPV), Vestibular Neuritis, Labyrinthitis, and Persistent Postural-Perceptual Dizziness (PPPD). These non-invasive exercises clear mechanical blockages, reduce nerve hypersensitivity, and help the brain adapt to permanent inner ear deficits.
By isolating the exact mechanism behind your symptoms, clinicians can build targeted movement protocols to address your specific diagnosis.
BPPV stands as the single most common cause of positional vertigo worldwide. The condition occurs when tiny calcium carbonate crystals (otoconia) break loose from their proper home in the utricle and migrate into one of the fluid-filled semicircular canals.
These conditions involve inflammation of the vestibulocochlear nerve, usually triggered by a common viral infection.
PPPD is a chronic functional neurological disorder that frequently develops after an acute episode of vertigo or a stressful medical event.
Here is an essential clinical reality that many standard care guides leave out: Relying long-term on motion sickness medications actually slows down your brain’s natural ability to recover from balance problems.
When a patient experiences severe vertigo, they are frequently prescribed vestibular suppressants like meclizine, dimenhydrinate, or low-dose benzodiazepines to calm their acute nausea. While these medications are helpful for the first 48 to 72 hours of an acute attack, continuing to take them for weeks or months can become a major barrier to your long-term recovery.
These drugs function by chemically sedating your entire balance network. However, for your brain to naturally rewire itself and adapt to an inner ear issue, it needs to experience the sensory mismatch.
If you keep the system sedated, your brain never gets the clear data it needs to start the healing process. Transitioning away from chemical suppressants and moving toward an active, movement-based Physiotherapy treatment program is a necessary step to truly restore your lasting stability.
This clinical shift from chemical management to active structural habituation brings us directly to the advanced diagnostic protocols used to safely evaluate your system.
How do specialists pinpoint the source of your dizziness? Clinicians map out balance issues by performing detailed physical tests, including infrared video oculography (VNG) to track involuntary eye movements, the Dix-Hallpike test for crystal detection, and dynamic posturography to measure real-world fall risks.
Diagnostic Pathway:
| Symptom Profiling ➔ Ocular VNG Tracking ➔ Dix-Hallpike Test ➔ Targeted Treatment Mapping. |
Because dizziness can stem from many different areas, a complete evaluation must look closely at how your inner ears and your eyes work together.
Your inner ear is hardwired directly to your eye muscles through a reflex called the Vestibulo-Ocular Reflex (VOR). This reflex is what keeps your vision perfectly steady when your head is bobbing up and down while walking.
When your inner ear is struggling, it triggers involuntary, rhythmic eye movements known as nystagmus. By placing specialized infrared goggles over your eyes in a dark room, clinicians can track these micro-movements, using the direction and speed of your eye drifts to pinpoint exactly which ear and canal are causing the trouble.
To confirm a diagnosis of BPPV, clinicians guide you through specific head turns while safely lowering you into a lying position. This test alters the orientation of the semicircular canals relative to gravity. If loose crystals are present, they will slide down the canal, triggering a predictable pattern of nystagmus that tells the therapist exactly which canal needs to be cleared.
What exercises are used to eliminate dizziness? Vestibular rehabilitation utilizes canalith repositioning maneuvers to clear displaced inner ear crystals, alongside gaze stabilization exercises to keep your vision clear and habituation movements to systematically desensitize your nervous system.
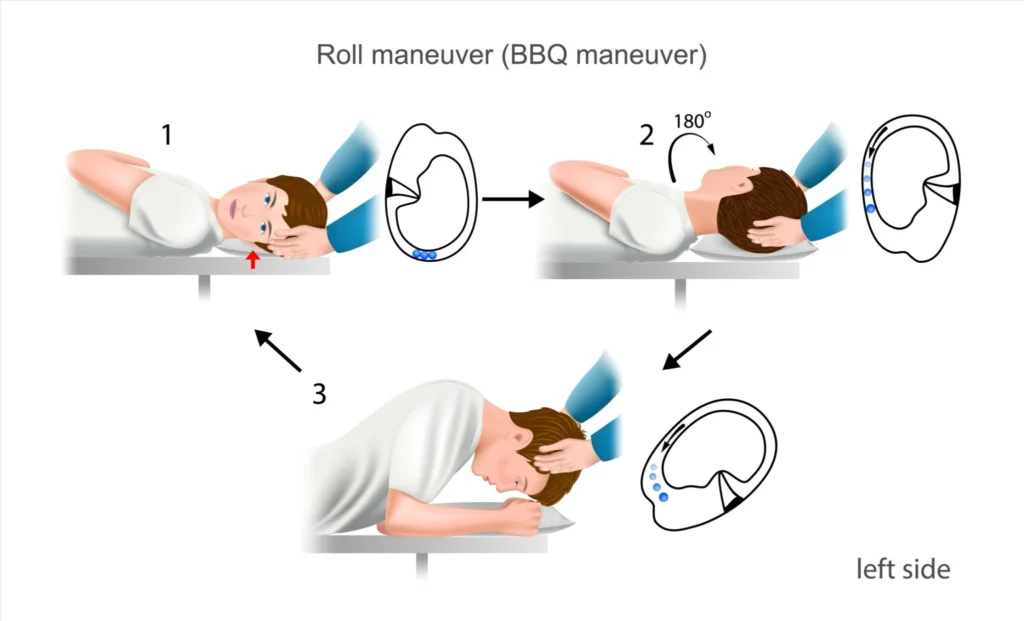
Once your physical diagnostic assessment is complete, your rehabilitation plan will focus on three primary therapeutic techniques:
If your testing confirms BPPV, your therapist will use specialized maneuvers like the Epley or Semont protocols. These procedures use sequential head tilts to harness the natural force of gravity, rolling the loose crystals through the semicircular canal and dropping them back into the utricle, where they can be naturally reabsorbed by your body. Most patients experience complete relief from BPPV within one to three sessions.
For individuals dealing with permanent nerve deficits from vestibular neuritis, the primary goal is restoring a stable visual field.
For persistent conditions like PPPD or general age-related balance loss, treatment focuses on carefully planned exposure to challenging movements.
To optimize your home environment and support your recovery process, consider implementing these simple structural safety adjustments:
☑ Incorporate Pathway Lighting: Install motion-activated LED nightlights along the path from your bed to the bathroom to assist your visual balance tracking at night.
☑ Secure Loose Flooring: Secure or completely remove loose area rugs and low electrical cords to eliminate potential tripping hazards while your balance is resetting.
☑ Utilize Multi-Point Support: Add stable grab bars in your shower stall and secure handrails along all indoor and outdoor staircases.
☑ Maintain Stable Footwear: Wear supportive, flat-soled indoor shoes instead of loose slippers or walking barefoot to maximize the sensory feedback from your feet.
During the diagnostic evaluation and the first few treatment sessions, provoking your typical symptoms is often necessary to identify the issue and kickstart your brain’s recovery. Experienced therapists manage this process carefully, ensuring your symptoms calm down completely before you leave the clinic.
Mechanical issues like BPPV often resolve in just 1 to 3 targeted sessions. Chronic sensory matching issues, nerve injuries, or conditions like PPPD require a more comprehensive approach, typically taking 6 to 12 weeks of consistent clinic visits and daily home exercises to achieve lasting stability.
Yes, a condition known as cervicogenic dizziness happens when injured or tight muscles in your upper neck send faulty spatial signals to your brain. This issue frequently mimics inner ear problems and can be treated effectively by combining gentle manual therapy with targeted neck-positioning exercises.
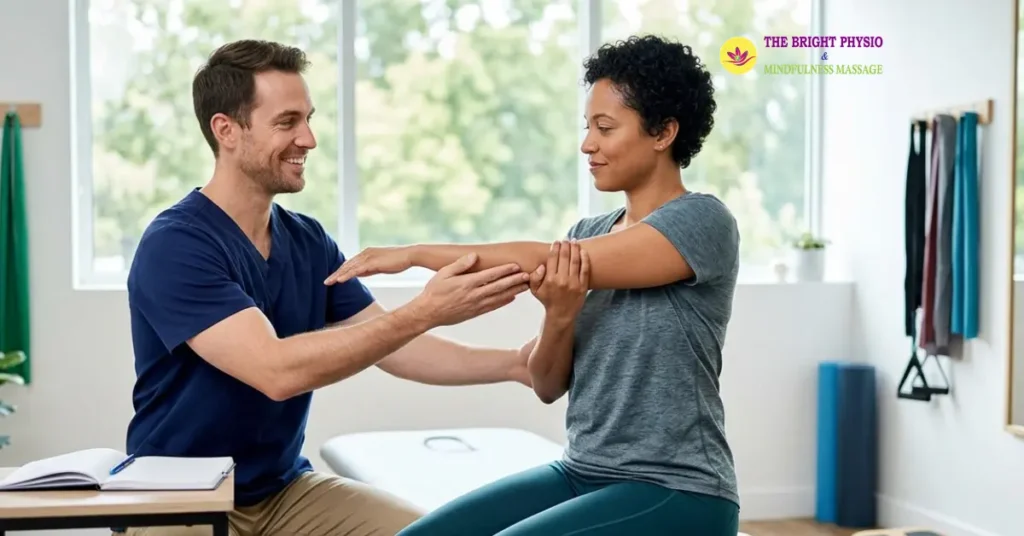
Most people walk into their first physiotherapy appointment with a mix of hope and uncertainty. They know something is wrong; they’ve been told physiotherapy treatment can help, but nobody has told them what actually happens once they’re in the room. After working across musculoskeletal rehabilitation, post-surgical recovery, and chronic pain management for over a decade, I’ve seen how that uncertainty often delays treatment or undermines outcomes. This guide removes the guesswork, so you arrive prepared and leave with real progress.
At your first appointment, a physiotherapist conducts a structured assessment covering your medical history, movement patterns, posture, and pain behaviour. This typically takes 45–60 minutes. No treatment is applied until the clinician has a clear clinical picture. You’ll leave with an initial diagnosis and an outline of your treatment direction.
The session opens with a subjective examination and a detailed conversation about your symptoms, when they started, what makes them better or worse, and how they affect your daily function. This isn’t small talk. Every answer shapes clinical reasoning.
Next comes the objective examination: postural analysis, movement screening, palpation of the affected structures, and functional testing. Your physiotherapist records baseline measurements, range of motion, pain scale ratings, and strength deficits that will be used to track your progress at every subsequent session.
Wear comfortable, loose-fitting clothing. If your lower back or hip is the issue, shorts are ideal. Bring any relevant imaging (MRI, X-ray reports) and a list of current medications.
Here’s something most patients don’t realise: a skilled physiotherapist rarely focuses only on where it hurts. The area of pain is often the victim, not the cause. A patient presenting with frozen shoulder, for example, frequently has significant thoracic spine stiffness driving that restriction. Treating only the shoulder misses the source entirely. That regional interdependence is why a good assessment takes time and why rushing it is a clinical mistake.
Physiotherapists build a treatment plan by combining their clinical diagnosis with your personal goals and lifestyle. Using evidence-based practice and impairment-based treatment principles, they set short-term and long-term rehabilitation targets, define session frequency, and select the modalities most appropriate for your condition and stage of tissue healing.
Once the assessment is complete, your physiotherapist will discuss their findings openly. A quality clinician explains why they’ve reached a diagnosis and how the proposed plan addresses it, not just what exercises to do.
Treatment plans follow a phased structure. Short-term goals address pain reduction, restoring range of motion, and reducing inflammation. Long-term goals focus on functional outcomes: returning to sport, resuming work duties, or moving without fear of re-injury. These goals should be specific and measurable; vague targets like “feeling better” are not clinically useful.
Session frequency typically runs two to three times per week in the early phase, tapering as you progress. Most plans incorporate a blend of manual therapy, therapeutic exercise, postural re-education, and, where appropriate, electrotherapy or hydrotherapy.
One point worth raising directly: if your physiotherapist proposes a plan that relies entirely on passive treatments where you lie on a table while things are done to you, ask questions. Modern evidence strongly supports active rehabilitation, where you are a participant, not a passenger. Passive-only programmes rarely produce durable outcomes and are a sign worth noting.
Physiotherapy treatment sessions use a combination of hands-on techniques and prescribed exercises to restore movement, reduce pain, and rebuild function, with the specific mix depending on your diagnosis, the stage of tissue healing, and your functional goals.
Here are the five core treatment modalities you’re likely to encounter:
Here’s a perspective that contradicts what most clinic websites would have you believe: the number of treatment modalities used in your sessions is not what determines how fast you recover. The single strongest predictor of a successful outcome in rehabilitation research is patient adherence to the home exercise programme. What happens in the clinic is the instruction. What happens at home is the recovery.
The number of sessions depends on your condition, its severity, and how your body responds to treatment. As a general guide: acute soft tissue injuries typically resolve in 4–6 sessions, post-surgical rehabilitation requires 12–24 sessions, and chronic pain conditions involve longer-term self-management strategies alongside active treatment.
These are not vague estimates; they reflect standard tissue healing timescales. An acute muscle strain progresses through the inflammation, proliferation, and remodelling phases over six to eight weeks. Surgical recovery timelines are governed by tissue repair biology and cannot be safely compressed.
For chronic pain conditions, central sensitisation means the nervous system itself has become hypersensitive. Progress here is measured differently, not just by pain reduction, but by improved function, sleep quality, and reduced avoidance behaviour. Discharge planning in these cases includes a sustainable self-management programme, not just a course of sessions.
Progress in rehabilitation is not always linear, but these markers indicate your treatment is on the right track:
Between physiotherapy appointments, prioritise completing your home exercise programme, managing activity levels, getting adequate sleep, and monitoring your symptoms. What you do in the 23 hours between sessions has far more influence on your recovery timeline than the single hour you spend in the clinic.
Activity modification is not rest. You’re not being asked to stop moving; you’re being asked to move within a range that supports healing rather than aggravating it. Load management is a clinical skill your physiotherapist teaches you; use it.
Sleep is a recovery tool that is consistently underestimated. Tissue repair, immune regulation, and pain modulation all occur during deep sleep. If your pain is interrupting sleep, flag it explicitly at your next session, as it changes the treatment approach.
Research consistently shows that most patients complete their home exercises for the first two or three days after a session, then compliance drops sharply. Life intervenes. The exercises feel less urgent once the post-session soreness fades.
The fix is habit-stacking. Attach your home exercises to something you already do without thinking, morning coffee, brushing your teeth, or the five minutes before you sit at your desk. The exercise itself takes three to seven minutes. The barrier is never time; it’s the friction of starting. Removing that friction by anchoring it to an existing behaviour is the single most effective compliance strategy I’ve used with patients.
When you commit to your home programme, you are doing more for your recovery than any passive treatment can achieve. If you want to make the most of your physiotherapy treatment, the work between sessions is where the real progress happens.
Physiotherapy works when it’s a collaboration. Your physiotherapist brings clinical expertise, objective assessment, and a structured pathway. You bring consistency, honest reporting of symptoms, and commitment to the programme outside the clinic.
The patients who recover fastest are rarely those with the least severe injuries. They’re the ones who ask good questions, follow through on home exercises, and communicate openly when something isn’t working. That combination of clinical expertise and patient engagement is what produces outcomes that last.
If you’re ready to begin, book an initial assessment with a qualified physiotherapist. Come with your questions written down, your imaging if you have it, and the expectation that this is a process worth investing in properly.
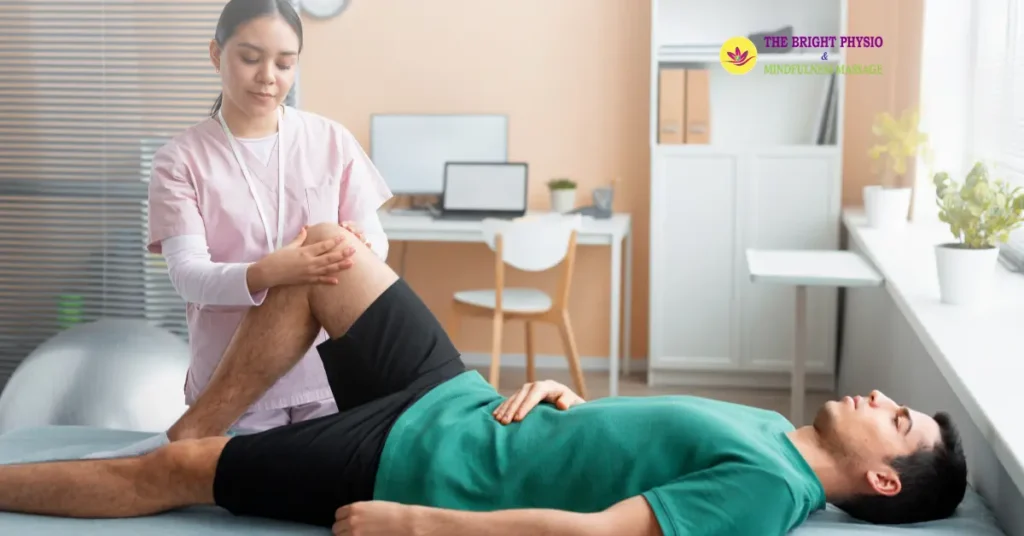
When dealing with pelvic floor dysfunction, many people assume that their symptoms are caused by weakness. They buy into the popular narrative that squeezing more, doing more Kegels, and forcing contractions is the universal fix for leakage, urgency, or pelvic discomfort. In clinical reality, a tight pelvic floor can cause the same symptoms as a weak one, but treating tightness with strengthening exercises will actively worsen your condition.
The pelvic floor is a dynamic bowl of muscles, ligaments, and connective tissues spanning the base of your pelvis. It supports vital organs, controls continence, and stabilizes your core. To restore comfort and control, we must accurately identify whether your system is hypertonic (chronically tight and unable to relax) or hypotonic (stretched, lengthened, and lacking tone).
To differentiate between a tight and weak pelvic floor, consider muscle length and functional mobility. A tight (hypertonic) pelvic floor is chronically contracted, shortened, and unable to fully relax. A weak (hypotonic) pelvic floor lacks structural tone and tension, remaining overly lengthened and failing to contract effectively under sudden physical pressure.
| [Normal Muscle Rest State] ➔ Flexible, adaptable, fully functional [Hypertonic / Tight State] ➔ Chronically contracted, shortened, fatigued [Hypotonic / Weak State] ➔ Stretched out, sagged, unable to lift |
To understand why this distinction matters, we must look at how skeletal muscle produces power. For any muscle group to exert force, it needs to move through a full range of motion, contracting completely from a fully relaxed, lengthened baseline.
When your pelvic floor muscles are hypertonic, they are stuck in a perpetual state of high tension. Because they are already holding a partial contraction, they have nowhere left to go when you cough, sneeze, or lift. They are chronically exhausted, stiff, and functionally weak.
Conversely, hypotonic muscles are overstretched and sagging. They lack the baseline resting tension needed to support the bladder, uterus, or rectum against gravity.
You can identify whether your pelvic floor is tight or weak by looking closely at your specific pain patterns and behavioral triggers. While both conditions cause urinary leakage, a tight pelvic floor typically presents with deep pelvic pain, painful intimacy, and straining during bowel movements, whereas a weak pelvic floor presents with physical sagging sensations and pressure.
The Insider View: The most pervasive misconception in modern wellness culture is that every pelvic symptom requires immediate strengthening. In our clinical experience, more than 40% of patients seeking help for stress leakage actually present with a hypertonic, tight pelvic floor.
If you have a hypertonic system and blindly perform dozens of Kegel squeezes every day, you are forcing an already exhausted, shortened muscle into an even tighter knot. This repetitive straining reduces local blood flow, builds up metabolic waste products, increases local nerve sensitivity, and accelerates your leakage issues.
Before starting any home exercise routine, you need a professional assessment. Seeking a personalized pelvic floor physiotherapy evaluation is the only definitive way to map your baseline muscle resting tone and prevent self-induced physical setbacks.
Physiotherapy resolves pelvic floor dysfunction by matching specialized physical therapies to your specific muscle tone. For a tight pelvic floor, treatment focuses on down-training, manual release, and biofeedback to restore tissue length. For a weak pelvic floor, therapy guides patients through progressive, functional strengthening and core integration to rebuild structural support.
When we treat a hypertonic patient, our primary goal is to down-train, teaching the central nervous system to release the chronic grip on the pelvic basin.
Once we confirm a true baseline weakness, the focus shifts to progressive, intentional load management.
For individuals recovering from complex structural strains such as postpartum tissue trauma, nerve stretching after a difficult childbirth, or prostatectomy side effects, restoring core stability requires a multi-stage approach. In these scenarios, a comprehensive physiotherapy treatment protocol must look beyond the pelvis entirely.
An expert clinician will systematically evaluate your breathing patterns, rib cage positioning, and hip alignment. Rebalancing these nearby structure zones ensures that your internal muscles are no longer forced to overcompensate for weak stabilizing muscles elsewhere in your body.
When left unaddressed, severe muscle laxity alters the internal layout of your pelvis, allowing organs to shift outward from their natural anatomical positions.
Untreated muscular weakness can progress from simple coordination issues to mechanical displacements like a cystocele (bladder prolapse) or rectocele (rectum prolapse). Restoring these deep support structures requires a dedicated, targeted approach to muscle rehabilitation.
Navigating your recovery requires understanding how the therapeutic milestones differ based on your underlying muscle pattern.
| Therapeutic Metric | Hypertonic (Tight) Recovery Strategy | Hypotonic (Weak) Recovery Strategy |
| Primary Clinical Focus | De-activation, muscle lengthening, relaxation | Isolation, strength building, core coordination |
| Initial Home Exercise | Reverse Kegels, child’s pose, deep diaphragmatic drops | Structured internal lifts with full relaxation phase |
| Manual Interventions | Internal trigger point release, connective tissue release | Surface stimulation, biofeedback tracking |
| Prognosis Indicator | Elimination of deep aching pain and straining | Resolution of exertional leaks and pressure |
Rehabilitating your deep core follows a structured progression where functional mobility must always precede strength.
Stage 1.
↓
Undergo a specialized evaluation to measure resting muscle tone, tissue flexibility, contraction strength, and coordination. Identify whether your primary dysfunction stems from high resting tension or true weakness.
Stage 2.
↓
Prioritize muscle elongation. For tight profiles, utilize manual releases and down-training; for weak profiles, ensure you can completely relax the muscle before attempting to build strength.
Stage 3.
↓
Practice isolating the pelvic floor without engaging neighboring muscles like your thighs or abdomen. Master the coordination between your breath and your internal muscular movement.
Stage 4.
↓
Incorporate targeted muscular contractions into your everyday movements, such as standing up, lifting objects, and exercising. This teaches your body to manage real-world abdominal pressure automatically.
If you are ready to resolve your symptoms and stop guessing about your internal health, use this operational checklist to start your recovery journey:
By stepping away from generic online health advice and committing to an accurate, evidence-based physical therapy plan, you protect your body from unnecessary strain and build a dependable foundation for long-term health and mobility.

The Bright Physio & Mindfulness Massage, we are dedicated to helping our patients move better, feel stronger, and live pain-free. Located in #105, 4904 30Ave Beaumont T4X1V1 our team of experienced and compassionate physiotherapists offers evidence-based treatment tailored to your individual needs.
Monday to Friday: 9am to 8pm
Saturday : 4-8pm
Sunday: Closed